Since Twitter’s Bootstrap library is very famous and common nowadays it’s quite natural that you might want to use Bootstrap styles within your Qlik Sense visualization extensions.
But ...
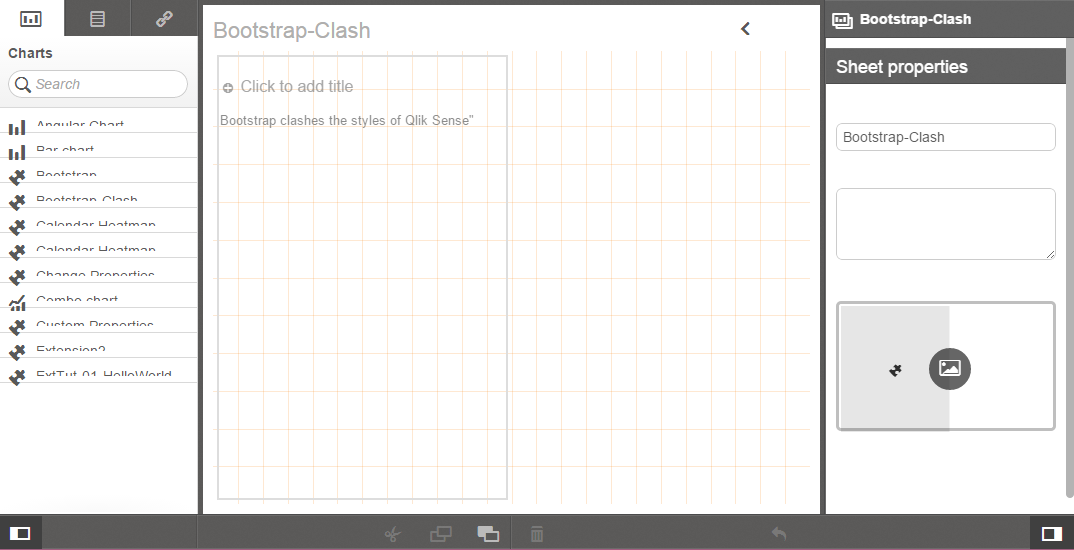
If you just start straightforward and try to load Bootstrap’s CSS (which can be downloaded from here), you’ll not be that happy because something definitely unwanted happens. The styling of Qlik Sense completely crashes because of CSS conflicts respectively Bootstrap’s CSS is overruling some of Qlik Sense’ CSS styles:
How to prevent clashes
But there’s an easy solution for this problem available. What we basically have to do is to “scope” Bootstrap’s style only to our extension and not to the rest of the document, so something like this
<!- Bootstrap styles do not work -->

<div class="bootstrap_inside">

    <!-- Here Bootstrap styles are working -->
    <button class="btn btn-success">A Bootstrap Button</button>

</div>

<!-- Bootstrap styles do not work anymore -->
There is already a W3C proposal available to solve this problem, which allows you to create scoped CSS by adding the scoped attribute to a style element (read more here). Unfortunately this solution is – frankly speaking – not widely supported.
But you can achieve the same result with standard CSS:
.bootstrap_inside { }

.bootstrap_inside .btn {

    /* now the class btn only works within the class bootstrap_inside */

}
Now it’s certainly not a practical solution to change the entire CSS library of Bootstrap manually. Just too much work and would also break if there are Bootstrap updates. Fortunately Bootstrap uses Less to generate the CSS, a CSS pre-processor which helps you to write cleaner CSS definitions.
Step by step instruction
The following instructions assume that you are familiar with the basics of Node.js, Bower and Grunt (or Gulp). All the steps demonstrated below can also be achieved manually or with other tools, but this just seems to be the easiest way for me.
Create a folder (we call it
BootstrapExtension)Inside the folder install Bootstrap using Bower:
bower install bootstrap
You’ll see a folder
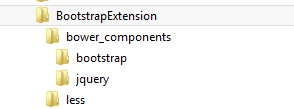
bower_componentsinside the folderBootstrapExtension. If you look into\BootstrapExtension\bower_components\bootstrap\lessyou’ll find all .less based styles of Bootstrap. The filebootstrap.lessis the entry point for generating the entire Bootstrap CSS.Create another folder called “less” where we put our main .less file (
_root.less)Your folder structure should then look like this
- Then we have to add our bootstrap_inside class:
.bootstrap_inside {}
- Nothing exciting so far but within this class we can now also include the main file from Boostrap. By doing so all the Bootstrap CSS definitions will then be “scoped” within
.bootstrap_inside, so instead of generating.btnour less file will then generate.bootstrap_inside .btn {}
.bootstrap_inside {
    @import "./../bower_components/less/bootstrap.less";
}
Generating the CSS output
Now we can use Grunt for generating the CSS based on the .less files with just a few simple steps:
- Install Grunt
npm install grunt --save-dev
- Install the Grunt plugin to compile LESS files to CSS (grunt-contrib-less)
npm install grunt-contrib-less --save-dev
Next we have to create a file with our Grunt tasks (
Gruntfile.js)Create the file in the root of BootstrapExtension and paste the following code to it:
'use strict';

module.exports = function(grunt) {

  grunt.initConfig({
    less: {
      bootstrap: {
        files: {
          "./output/scoped-bootstrap.css": "./less/_root.less"
        }
      }
    }
  });

  grunt.loadNpmTasks('grunt-contrib-less');

  grunt.registerTask('default', ['less']);

};
Finally run the command grunt in the command line and you’ll see a folder output appearing containing a file named scoped-bootstrap.css with the generated style
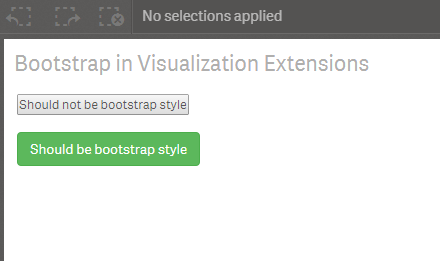
The last step is easy, reference the generated scope-bootstrap.css file in your extension and use it as follows:
paint: function ( $element /*, layout*/ ) {

    $element.empty();

    var $noBootstrap = $( document.createElement( 'div' ) );
    $noBootstrap.html( '<button>Should not be bootstrap style</button><br/><br/>' );
    $element.append( $noBootstrap );

    var $bootstrapStyle = $( document.createElement( 'div' ) );
    $bootstrapStyle.addClass( 'bootstrap_inside' );
    $bootstrapStyle.html( '<button class="btn btn-success">Should be bootstrap style</button><br/>' );
    $element.append( $bootstrapStyle );

}
The output & final result